You will need a Phillips screw driver to replace your monitor.
Step 1. Using the Phillips screw driver, undo the top and bottom screws on the monitor.
Step 2. Gently lift the monitor away from the footboard, you will notice the battery pack positioned behind the monitor in the footboard and a small opening where the wiring runs through to the sensor.
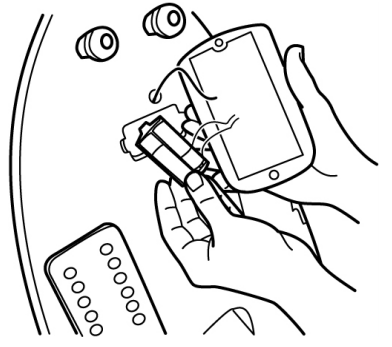
Gently pull the wire and connector through the hole so you can undo the connection between the monitor and sensor.
Step 3. Once the connection has been undone, remove the batteries from the original monitor and place into the new monitor.
Step 4. Reconnect the sensor wire and monitor wire and gently feed it through the opening.
Step 5. Reposition the new monitor on the footboard so the screw holes line up and screw in the new monitor.
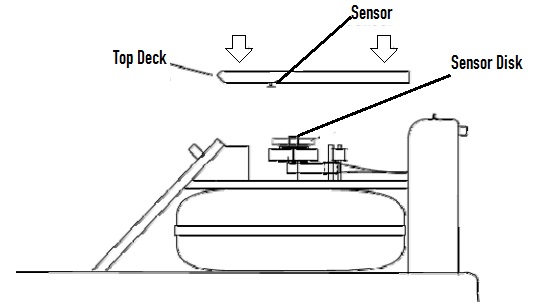
If your monitor turns on but does not count down, the following points can be checked:
- Connection between sensor and monitor is attached (you do not need to undo the footboard to see the connection, gently pull the connection through the opening as you did in Step 2 above).

- All the magnets are in position on the sensor disk
- Sensor is not close enough to the sensor disk.
- Wires from the sensor are broken The diagram below shows the position of the sensor and sensor disk. (Please note the top deck in the diagram is lifted up to show the position of the sensor disk and sensor more easily – you do not need to remove the top deck.)