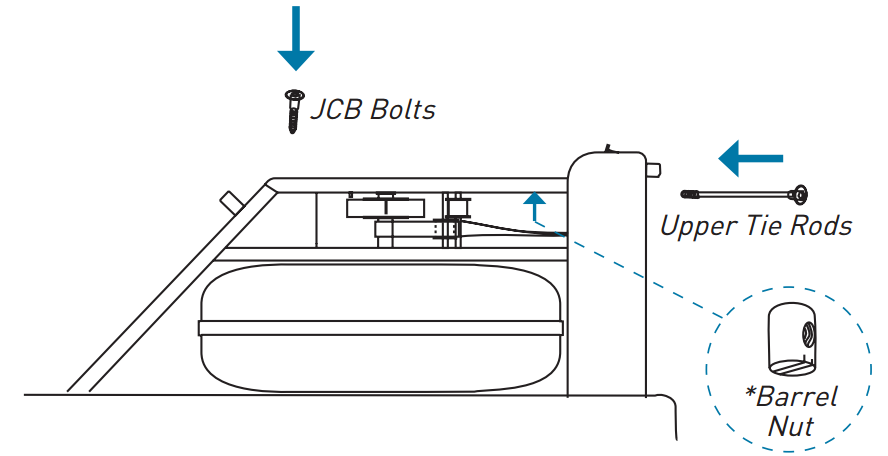
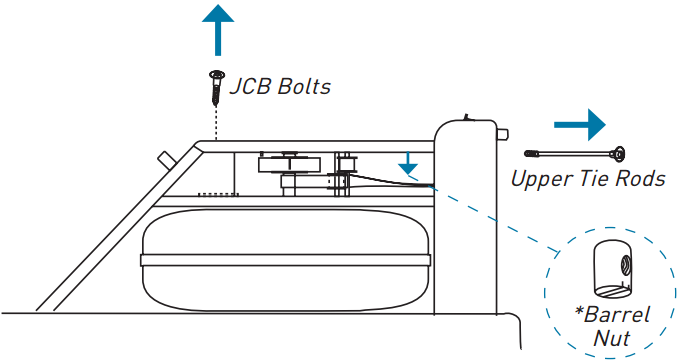
Step 1. Detach the top deck from the tank assembly by unscrewing the upper tie rod bolts and the top deck JCB bolts. *When removing the tie rods, a barrel nut from under the top deck will come out. Keep for reassembly.
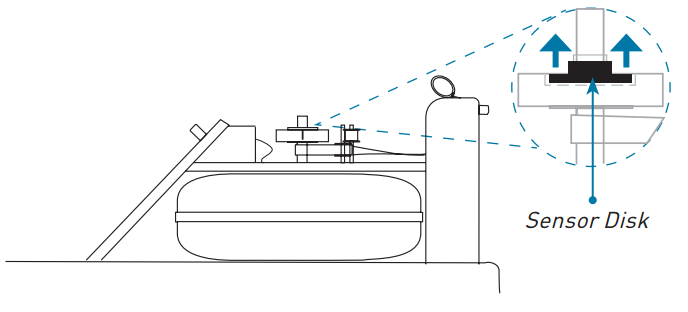
Step 2. Gently lift the top deck, be careful not to dislodge the guide pulleys. Set the top deck to the side (do not disconnect the sensor wires). Remove the sensor disk from the paddle shaft. *If you have trouble removing it, you may need to pry the sensor disk up with a pair of pliers or channel locks.
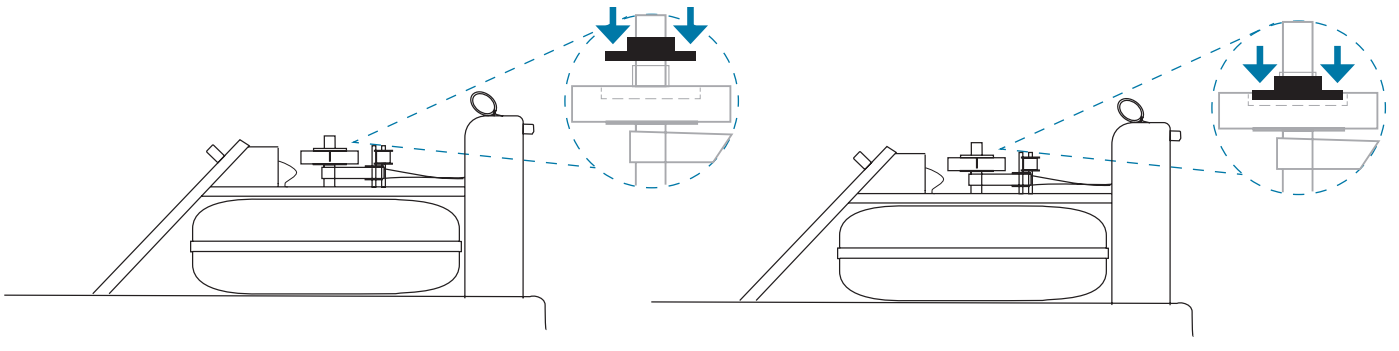
Step 3. With the silver magnets facing upwards, place the new sensor disk onto the paddle shaft. Be sure to push the sensor disk down until the base of thesensor disk is fully recessed into the clutch. If the disk is sitting too high, it will crack due to excess pressure.
Step 4. Re-position the top deck to the tank assembly by screwing in the upper tie rod bolts, the barrel nut, and the top deck JCB bolts.