Knowledge Base Archives: A1/GX

A1/GX Service Instructions

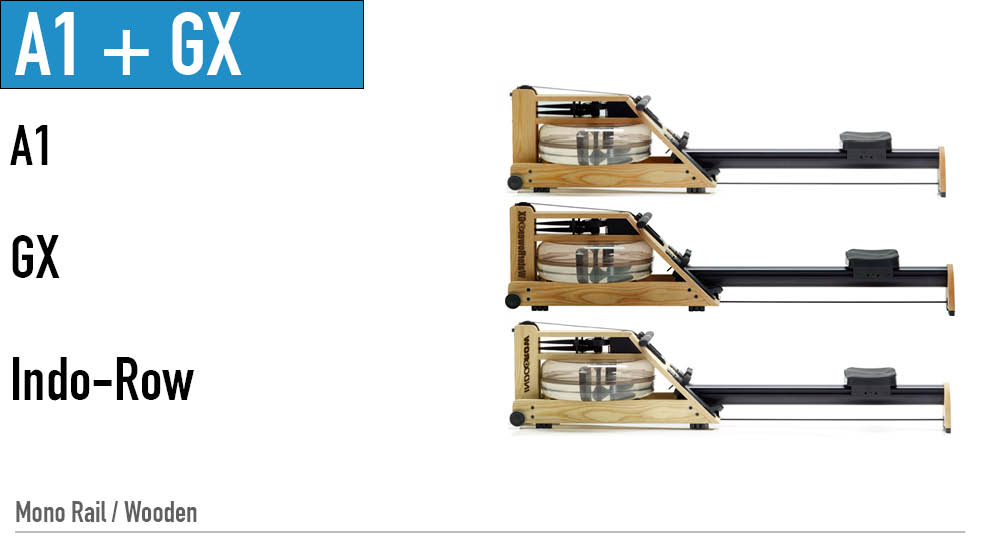
A1/GX: Short Tank Assembly Replacement

Step 1. Remove the handle from the handle rests and place in the full forward position. Step 2. Stand the WaterRower upright and disconnect the bungee. Step 3. Lay the WaterRower down and pull the handle so the drive strap unwinds from the clutch housing. Remove the handle and drive strap from the clutch by unstrapping the …

A1/GX Service Instructions

A1/GX: Full Tank Assembly Replacement

Handle Removal Step 1.  Remove the Handle from the handle rests and place the handle in the full forward position Step 2.  Stand the WaterRower upright and disconnect the bungee from the recoil belt as shown Step 3.  Lay the WaterRower down and slowly pull the handle so that the drive strap unwinds from the …

A1/GX Service Instructions

A1/GX: Forward Riser Replacement

For Video Instructions, please see the following link: Replacing the Forward Riser Assembly Step 1- Remove handle assembly (see handle removal replacement instructions) Step 2- Remove Recoil Belt (see recoil belt replacement instructions) Step 3- Remove Tie Rod bolts as shown.   Step 4- Remove the fasteners connecting the forward riser bottom bracket to the …

A1/GX Service Instructions

A1/GX: Tank Reseal with Glue Kit

If your tank has sprung a leak, the best way to go about repairing it is with our Tank Glue Kit. We have full written instructions as well as a service video available for you below.   Please read all instructions carefully and view the service video before attempting this repair. Be sure to handle the …

A1/GX Service Instructions

A1/GX: Top Deck Replacement

For Video Instructions, click here: Removing the Top Deck Step 1- Remove the handle from the handle rests and place the handle in the full forward position as shown.   Step 2- Stand the WaterRower upright and disconnect the bungee as shown. Step 3- Lay the WaterRower down. Remove the Tie Rods and JCB bolts …

A1/GX Service Instructions

A1/GX: Recoil Bushing Replacement

Handle Removal Step 1- Remove the handle from the Handle rests and place the Handle in the full forward position.   Step 2- Stand the WaterRower upright and disconnect the bungee from the Recoil Belt as shown.   Step 3- Lay the WaterRower down and slowly pull the handle so that the Drive Strap unwinds …

A1/GX Service Instructions

A1/GX: Oilite Bearing Replacement

Step 1- Remove the Handle from the handle rests and place the handle in the full forward position. Step 2- Stand the WaterRower upright and disconnect the bungee from the Recoil Belt as shown.   Step 3- Lay the WaterRower down and slowly pull the handle so that the Drive Strap unwinds from the clutch …

A1/GX Service Instructions

A1/GX: Level Gauge Location

The Level Gauge sticker on all Series 4 (S4) model WaterRower units, is located on the side of the tank under the tank stopper. The Level Gauge sticker on the A1 and Indo-Row units is located on the bottom of the tank. On the A1 and GX WaterRower units, this sticker also has the unit’s ...
A1/GX Service Instructions

A1/GX: Recoil Belt Buckle Replacement

Step 1- Pass the Recoil Belt through the bungee buckle with the belt facing the serrations on the buckle as shown. Step 2- Pass the Recoil Belt through the D-ring and back through the bungee buckle as shown. The Recoil Belt should follow itself back through the buckle. It is advised that the loose end …

A1/GX Service Instructions

A1/GX: Recoil Belt Replacement

For Video Instructions, click here: Replacing the Recoil Belt Step 1- Remove the handle from the handle rests and place the handle in the full forward position   Step 2- Stand the WaterRower upright and disconnect the bungee from the recoil belt as shown   Step 3- Lay the machine down and remove the recoil …