Replacing the GX Bungee will only require the use of your Allen key tool. To order this part, head to our website: WRPK1000 – GX/A1 Bungee Assembly
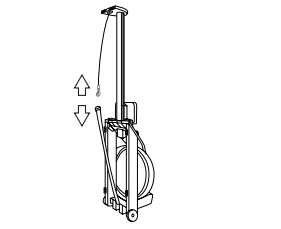
Step 1: Stand the A1/GX WaterRower upright and unclip the bungee cord from the recoil belt.
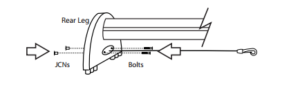
Step 2: Lay your WaterRower back down. Using the 5mm Allen Key, remove the two horizontal Joint Connector Nuts (JCNs) from the back of the Rear Leg. As you unscrew these JCNs, it will be necessary to put pressure on the bolts (on the inside of the rear leg) to be able to remove these completely.
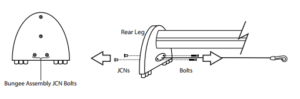
Step 3: Remove the bungee assembly from the inside of the rear leg. Remove the two bolts that are in the plastic bungee assembly plate if you have not done so already.
Step 4: Position the new bungee assembly onto the rear leg. Replace the JCNs (on the outside of the leg) and the joint connector bolts (on the inside) and tighten. You may find it necessary to put extra pressure on the bolt in order to completely tighten it. To do this, you can use another Allen key, or a screwdriver to help hold the bolt in place while you tighten the JCNs.
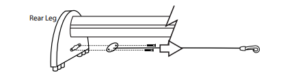
* Please note that the knot in the bungee cord may cause the plastic Bungee Assembly Plate lift away from the Rear Leg. As you tighten the bolts, the bungee knot will flatten a little so that the Bungee Plate will be flat against the wood.
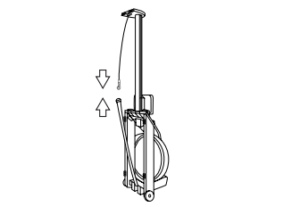
Step 5: Stand the WaterRower upright again and re-clip the bungee assembly and the recoil belt.