A1/GX Service Instructions

A1/GX: Foot Strap Replacement

Replacing the foot strap on the A1/GX WaterRower is very simple; in order to replace the strap, you will need a pair of scissors and a Phillips screw driver. To order this part, head to our website: WRPP1710 – GX Footstrap Set.

Step 1: Using a pair of scissors, cut away the current foot strap.

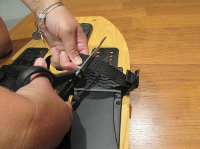
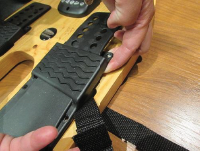
Step 2: Unscrew the two screws on the right of the foot board.

Step 3:  Lift the foot pad up and pull out the current foot strap.

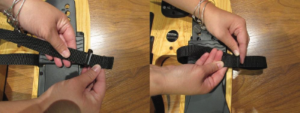
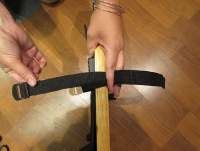
Step 4:  Slide the sewn end of the foot strap into the slot, making sure the buckle is facing upwards (teeth facing upwards).

Step 5:  Lift up the foot pad and place the tab underneath it.

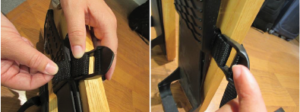
Step 6: Loop remaining strap through the other slot.

Step 7:  Re-screw the foot pad back into place.

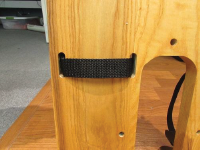
Step 8:  Re-thread the strap through the buckle.

Related Articles

  • S1: Short Tank Assembly Replacement

    Step 1. Remove the handle from the handle rests and place in the full forward position. Step 2. Stand the WaterRower upright and disconnect the bungee. Step 3. Lay the WaterRower down...

  • M1: Monitor Wire Assembly Replacement

    Position the handle forward to the front Forward Riser pulley Remove the handle rest bolts from the footboard and then angle the footboard away from the tank Remove the aluminum...

  • Series 3: Full Tank Assembly Replacement

    Handle Removal Step 1.  Remove the Handle from the handle rests and place the handle in the full forward position Step 2.  Stand the WaterRower upright and disconnect the bungee...

  • Series 4: Short Tank Assembly Replacement

    Replacing your short tank doesn’t have to be a headache – head on over to our instructions page to check out our resources to help you through.