S1 Service Instructions

S1: Rail Extrusion Replacement

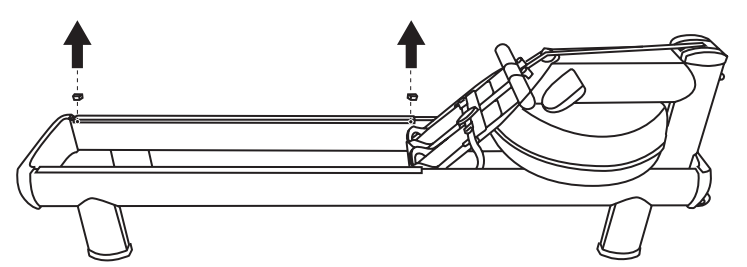
Step 1.  With the 5mm Allen key, unscrew the seat stops. There are two on the front and back of each rail.

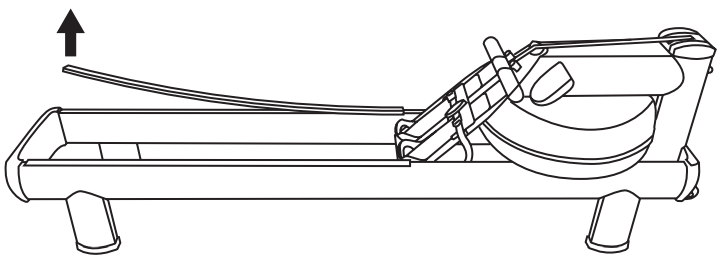
Step 2.  Peel the old extrusion off the rail.

Step 3.  Using alcohol, remove ALL the left over adhesive. Please do not use any other solvent as it may damage the paint.

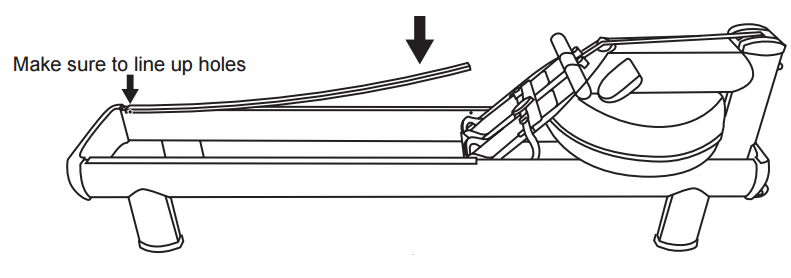
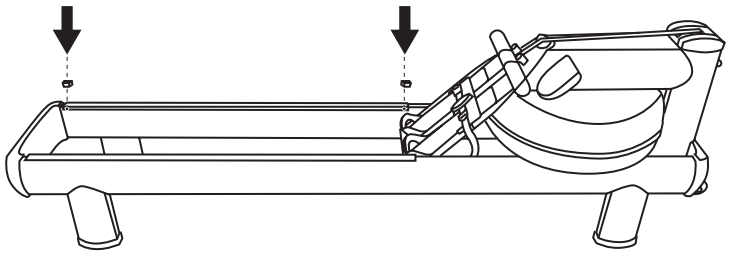
Step 4.  Once the rail surface is cleaned, attach the new extrusions. Peel away the one side of tape. Line up the seat stop holes in the extrusions to the holes in the rail. Press evenly down the length of the extrusion to adhere it firmly and smoothly to the surface of the rail.

Step 5.  With the 5mm Allen key, screw back in the rail seat stops.

Step 6.  If necessary, repeat steps 1-5 on the other rail.

Related Articles

  • A1/GX: Full Tank Assembly Replacement

    Handle Removal Step 1.  Remove the Handle from the handle rests and place the handle in the full forward position Step 2.  Stand the WaterRower upright and disconnect the bungee...

  • Series 3: Single Bungee Replacement

    For Video Instructions, please see the following link: Replacing the S4 Bungee Assembly Step 1- Remove the Handle from the handle rests and place the handle in the full forward...

  • M1: Monitor Board Replacement

    Step 1- Remove screws (2) fastening the battery cover at the rear of the monitor as shown. Step 2– Remove the Battery Cover as shown. Step 3- Remove the Battery...

  • S1: Oilite Bearing Replacement

    Step 1- Remove the Handle from the handle rests and place the handle in the full forward position. Step 2- Stand the WaterRower upright and disconnect the bungee from the...