For Video Instructions, click here: Replacing the Recoil Belt
Step 1- Remove the handle from the handle rests and place the handle in the full forward position
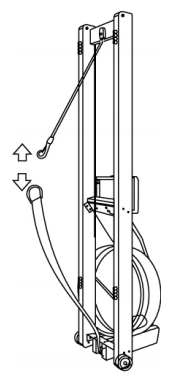
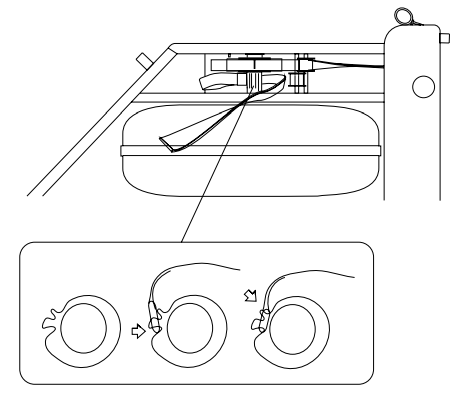
Step 2- Stand the WaterRower upright and disconnect the bungee from the recoil belt as shown
Step 3- Lay the machine down and remove the recoil strap from the machine. It may require some effort to remove the retaining ring from the recoil bush.
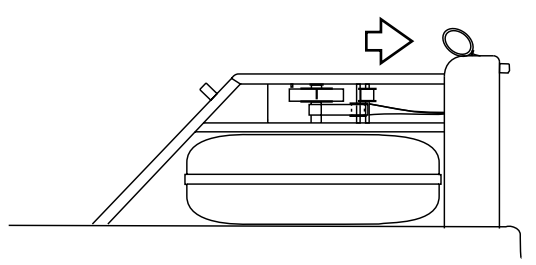
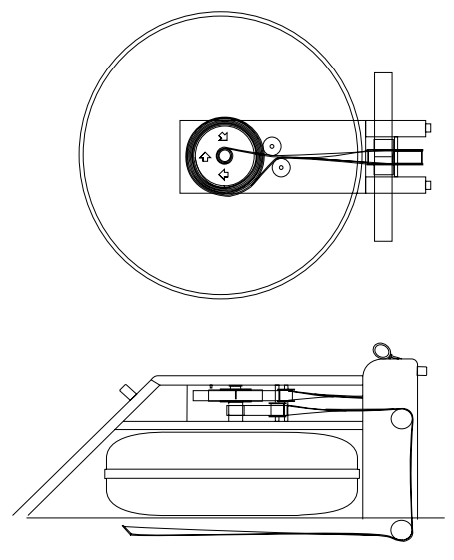
Step 4- Connect the Recoil Belt to the Recoil Bush (on the paddle shaft) as shown. It may require some effort to seat the retaining ring onto the fingers of the Recoil Bush. Wrap the Recoil Belt around the Recoil Bush in a clockwise direction (as viewed from above) as shown. With the handle still in its full forward position the Recoil Belt should wrap around the Recoil Bush between one and two wraps.
Step 5- Feed the Recoil Belt away from the Recoil Bush towards the front of the machine. Pass the belt inside the Recoil Guide Pulley (towards the center of the machine). Pass the Recoil Belt over the Recoil Guided Bushes in at the front of the WaterRower. Pass the belt underneath the front of the machine.
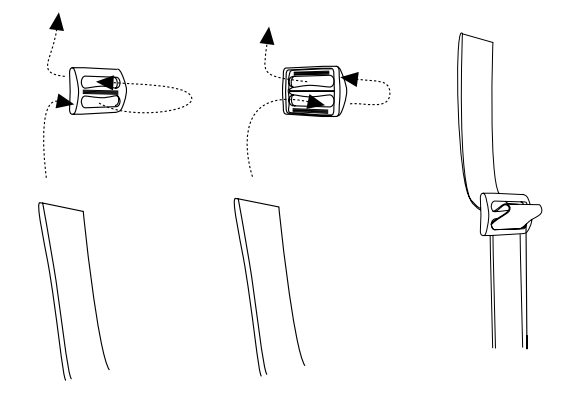
Step 6- Stand the machine upright. It may be necessary to connect the D-ring with the Recoil Belt as shown, if not go to step 4.
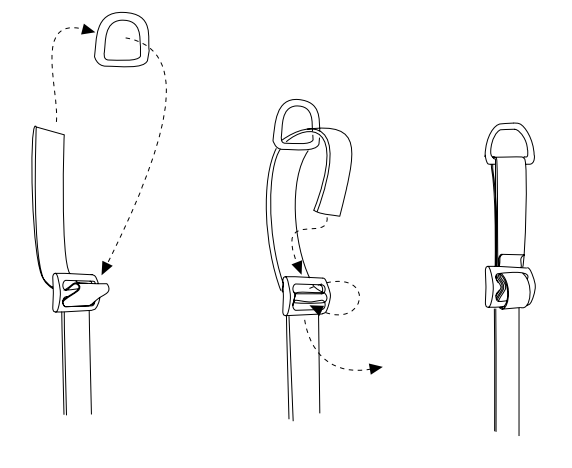
Step 7- With the machine standing upright connect the bungee to the D-ring as shown.